Pages

Tuesday, August 28, 2012

Break in Posts because- The BABY is here!

Just wanted to let you all know that after almost 12 hours of labor, we finally welcomed our son into the world!
Needless to say, I'll be away from posting for a day or two.
(Update- or two weeks thanks to some complications... Not to mention that adjusting to the new routines took a bit longer than I anticipated.)

 
Baby Groner
10 lbs 7 oz
23 inches
100% Awesome


Enjoy your nights!

Sunday, August 26, 2012

Local: Northern Virginia: Free Mulch for Garden and Landscaping Projects at Fairfax County Parks

This weekend, as Jon and I were impatiently waiting for Baby's arrival (and.... still waiting) we decided to take fate into our own hands. We decided that a "watched pot never boils", and we were just too prepared. What we needed was a major project- one that would make labor really, really inconvenient. That would almost guarantee Baby's sudden arrival! Things always happen at the least convenient time right?

We had put off landscaping for several months. Our gardens looked like a scene from a post apocalyptic movie. I had this deep rooted (and completely false) belief that I was a master gardner. After killing everything in the garden and being over run by weeds (for the second year in a row). Jon convinced me to clear out the gardens and just plant simple bushes and mulch to make our yard routine easier when Baby Groner does make his appearance.

Being the thrifty person that I am, I was concerned with the cost of this project. Jon's a certified genius and he thinks large scale. When Jon Groner wants to do a little landscaping, he's thinking water features, koi fish and rare orchids (all of which he mentioned when discussing this- Love him:) I'm thinking rip everything up and buy a box of mixed ground cover seeds at Costco.

Jon remembered that the Fairfax County Park Authority gives away FREE MULCH (I adore free!) at a bunch of their park sites. We went out and bought a pitch fork, borrowed a friends truck and got about $140.00 worth of mulch for free! We bought a few bushes, and ta-da! Maintenance free landscaping is done!

The Fairfax County Park Authority's mulch is high quality, clean and double shredded. They also have leaf mulch in season. They have different drop off locations, that you can find by clicking here.

We got our mulch from Bull Run Regional Park at Old Yates Ford Road Clifton, Virginia 20124.
Because they distribute mulch as they have it to many different locations, you can call to double check that your preferred location is well stocked before you head out. You can check by calling 703-324-5995.


This is the mulch pile at Bull Run Regional Park:


This is a map of exactly where the parking lot is to get it: (They have many different sites- unless you live close to this location... click here to see alternate locations.

Saturday, August 25, 2012

Freezer Meal Organization and Planning

Freezer Meals last week were AMAZING! I am so in love with this method of cooking, it's a borderline obsession. We didn't even remotely stick to the menu plan, but it worked out really well anyway.When I posted last weeks menu and shopping list, I hadn't counted on the fact that most recipes made two casseroles (thinking the cook would be making one for dinner and an extra to freeze), and that since there are only two of us- one casserole normally lasted for two dinners and a lunch. So we had way more food planned than we could possibly eat. When I plan this weeks menus, I'll learn from last week and adjust accordingly.


The only problem we ran into with the freezer casseroles was the freezer. We have a fancy french door fridge that looks great but it's freezer is pretty much useless due to it's size and shelving structure. We had been talking about getting a chest freezer but hadn't really found a deal good enough to make us move on it. I was concerned about the older models we found on craiglist with electricity usage. We used to have two 55 gallon fish tanks and a 75 gallon salt water tank- our electric bill was INSANE. When we found out we were pregnant, we gave them all away for free (or good karma as I see it) on craigslist due to the massive time investment keeping the tanks up cost us. I couldn't believe the reduction in the electric bill!


I searched craigslist all week, and found a chest freezer that was only 3 years old for one hundred and fifty dollars. I wrote the poster, but she had someone pending. I started looking commercially to see if I could find a clearance or floor model sale. I struck gold at Lowes. I found a Holiday 5 foot chest freezer, brand spanking new, retail price is $169.00 (you can see it here). You can use a 20% off coupon to save $33.80, making your new freezer $135.20 PLUS Lowes offered to deliver it the next day (which was a Saturday!), install it (which involves plugging it in- but still) and haul away any old appliance for FREE. Score! When I searched online- they only offered the free delivery for appliances over $400.00, I may have gotten a special deal... So if they quote you anything other than free- try to work with them. If your local- go to the Woodbridge Lowes on Smoketown Road. Because it's new, it comes with an energy guide which quotes a yearly energy cost of $26.00.


This is the second awesome experience we've had with Lowes (the last guy we spoke to there helped us find a Smoker/Gas/Charcoal grill that had a missing thermometer (which you can buy online at the parts store for $7.00), and gave it to us for $100.00, saving us $200.00 and an entire afternoon of putting it together (it was a floor model so no assembly was needed.) Keep it up Lowes- you and I are are just starting what could be a beautiful relationship.


Once I started filling the freezer, I started envisioning a way to have a visual display of what was in the freezer. I was originally thinking large magnetic dry erase board with recipe cards (complete with photos) arranged on the board using magnets. But then I realized the cost involved in this plan, and decided it wasn't worth it. Then I kicked myself (not literally), because the entire freezer is a giant magnetic dry erase board! So... I came up with this for FREE (I seriously love free!):


I used our printer to print out titles. "What's in me?" (what the freezer contains) and "What I'm missing." (what needs to be made and frozen). I glued them to scrapbook paper and cut up a roll of magnetic strip tape I had in the craft room. I attached 4 small pieces of magnet to the back of each card.

 
For each recipe card, I had one one index card with the recipe on it, another recipe card with the photo on it and I used 4 small pieces of magnet tape in the middle then sealed the edges of the cards using scotch tape.

 
When we're hungry- we can peruse the "freezer menu" of what we have. When it's gone, we move that card over to the "What I'm missing" section. If it's horrible and we hate it, we can throw that card out.

 
I went to party city and purchased disposable freezer casserole dishes for $.69, they have aluminium covers as well that pinch close. We cover the dish with plastic wrap then pinch the top on (put a note on label to remove plastic wrap before baking).
The above photo is lasagna.

 
Chicken enchilada casserole.

 
Chicken enchilada casserole covered in cheese.

 
Finished casserole, ready for the oven. I always label the same and include the dish title, expiration dates, a plastic wrap warning (if applicable), instructions for baking/reheating  and any other pertinent info.
 
After this week, I have 5 casseroles, frozen homemade mozzarella sticks, and frozen BBQ Beef Cups (packaged individually- can be microwaved to reheat in 4 minutes). I have no prep time for dinner during the week, just throw in the casserole about 5pm and go get it out at 6pm. I'm excited to see what I can add to my stash this week!

Wednesday, August 22, 2012

Organizing using Containers from Dollar Tree

The most important thing that I've learned in the past few years is that you can't organize clutter. Seriously, you can't. You can buy out the entire container section of Bed Bath and Beyond and all you'll have is more junk.

I decluttered for almost a year. Every day for 15 minutes, I went into a different room and went through a small section and threw out everything I could. After I got my life together, I started donating. I would call up Am Vets and arrange a pick up date for a donation (they'll come to your house and pick it up from the porch). For the month before the pick up date, I would fill up bags and leave them in the dining room until pick up date. I've probably given away half of my belongings in the last year and it felt great!

Once your done decluttering, you're left with a very small amount of stuff that you actually need. Now is the time to start organizing. You have two options, you can head to the container store or Bed Bath and Beyond and buy gorgeous fabric covered containers to put your things away or you can head to the Dollar Tree and pick up a bunch of really well made containers.

Here are a few examples of how I use Dollar Tree containers (each 1.00!) in our house:

 
All of our office supplies are separated into the green containers onto the top shelves and labeled. The green containers are available at Dollar Tree for one dollar apiece. They have these in several colors and sizes.

 
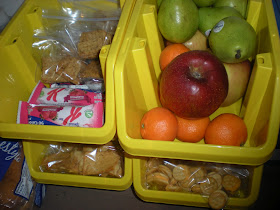
We upgraded our previous cardboard snack box to Dollar Tree's stackable bins. They have these in several colors.

 
These bins are pretty sturdy and well worth the dollar paid. I like them better than similar containers found at Walmart.

Closet Organization: An alternative to dressers

When I started getting myself organized, one of the hardest things for me was my closet. I kept trying to do it perfect. Which meant I would let it get pretty bad until I had time to "do it right".  Eventually, FlyLady (flylady.net) taught me to stop procrastinating and to start working with myself instead of against myself.


I sat down and really thought about why I hate doing laundry and putting it away. I figured out that I hate hanging clothing up. No idea why, I just do. I also figured out that I didn't mind folding clothes so much and I even liked doing the towels. I liked the towels because they were easy to fold all nice and neat, and then I could stack them nicely in the hall closet. I liked the fact that they had a specific place and that I could see the positive results of my work. I figured out that I HATED the dresser with a passion because all the drawers were messy and full, which meant I had to stuff the clothes in and try to close the drawers. Plus, you could never find what you needed.


About two years ago, after I had a self assessment of what wasn't working and why, I made some changes. I've kept a neat and clean closet for the entire two years (thank you Flylady!). If I had a photo of what my closet looked like BEFORE this transformation, you would be even more impressed.


I should note- I'm a fan of organization, but not necessarily of beautiful organization. The ultimate goal is to have organization along with coordinated hand crafted labels and background paint. However, I realize who I am and how far I've come. The most important thing to me is to establish routines that I can live with. Peel and stick labels will do for now, and one day when my attention isn't needed elsewhere, I can make things beautiful too. But I'll never let my need for "perfection" prevent me from organizing.

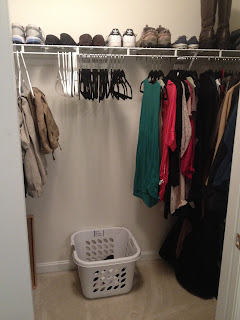
This is the system that's worked for us. Our last closet was a more traditional straight bar and we did the same things, we just have more room in this walk in closet.

Jon has the left side of the closet and I have the right side.

Jon uses white plastic hangers and I use black felt hangers (because my shirts tend to fall off hangers easily- but Jon's doesn't)

Our shoes are lined up on the top shelf neatly.

We keep our "Beach Bag" (The blue thermos tote) on the shelf as well. This holds our beach towels (we only own two), our bathing suits, sunblock, and chapstick. When we want to hit the pool, we can put our suits on, add a cooler pack to the bag and fill it up with waters and snacks. As a bonus- It's waterproof and we can stick wet suits in it for the trip home.

My purses are stuffed with tissue paper and stood up on the shelf. I'm clearly not a bag girl, so this worked well for me since I rarely change purses.

The middle section of the closet is kept clear. We keep empty hangers there. When you pull a shirt off a hanger without removing that hanger, it sticks up in the air and gets hung up on other hangers. Do this a few times and your hangers become tangled. By taking the hanger and clothing off, it keeps the closet orderly, makes it easy to grab empty hangers when you hang up clothes (no hunting), and gives me a sense of peace when I open the door to an empty center section.


I keep two giant tubs of off season clothing (washed and ready to wear again) on the floor of the closet. I can then use those as a table to hold our blue canvas accessories basket (ties, belts, cuff links etc). I also use this as a landing zone for important things that I find in Jon's pockets as I do laundry. That way, as soon as he says "Honey have you seen my....", I can say "Blue basket."

The off season clothing tubs also hold a large plastic drawer (purchased at walmart) for my pants. All of my pants, jeans etc. go in here folded up. If there ever comes a time when I have so many pants that this becomes crowded- then I purchase another plastic drawer and separate them into jeans and dress pants. The idea is to have easy access to what you want.


Because I hate hanging things up, I use plastic drawers for everything that isn't easily wrinkled. I have a container for bras, panties, sports bras, camisoles, maternity tee shirts, gym tops, gym bottoms, seasonal (underarmour, extra swimsuits etc), extra socks, shorts, and skirts. This makes putting clothes away a breeze! For instance, I only have three pairs of shorts, and it's easy to find them within their own drawer.

This works so well for us, that I used this system in the baby's room (which looks much better since all of the units were bought together). Baby has Onsies/Lounge, Tops, and Bottoms in each size up until he's 18 months. When he grows out of 0-3 month clothing, they get emptied into an old diaper box, sealed, labeled and put away for the next baby. The empty drawers that used to have 0-3 mos clothing in it, are now labeled for the next size up. We had extra room, so we also use a container for crib sheets and one for changing table covers.


We use a laundry sorter system so that I can just grab an armful when I switch laundry, I don't have to try to sort as I go. This genius little device shown below can be purchased at Target by clicking here. It's used to machine wash your bras with no damage and I adore them! There are two openings, one on the top, and one on the bottom so each holds two bras. This way, I can tuck the bras into the bags and toss them right into the laundry sorter. I don't have to pay special attention to them at all!


I keep a "Sock Monster Basket" in the middle of the closet. This serves two purposes. I can throw the unmatched socks in here and sort through it once a week to make matches. This also serves as an emergency dumping ground if something happens and I just don't have the time to put the clean laundry away. This encourages me to switch the laundry anyway and I can fold before I go to bed.


The general locations for the clothing that is hung is marked in labels. The house rule is, if you buy more clothes, you get rid of an equal amount of old clothes. Because almost all of my clothing is folded (except dresses and dressy tops), I don't need a lot of hanging space. We use the dresser for Jon's underwear, white tee shirts, both of our socks, and gym clothes.


In the end, It works great for us and is easy for me to keep up. Anything that I can keep organized without effort gives me time to work on an area that doesn't come so easily (like my car!!)

Tuesday, August 21, 2012

15 Minute Breakfast Pizza: Cheap, Easy, and Delicious.

Meet Jon's favorite breakfast: Bacon Breakfast Pizza. There are as many variations of this as there are breakfast foods. I'll include some suggestions after the "recipe".

Preheat oven to 400 degrees.

You can make your own pizza crust, buy pizza dough, or just do what we do and buy the Wegmans version of the Boboli pizza crust.

Scramble up 4 eggs and then spoon and spread over the pizza crust.


You can make the bacon from scratch, or if you're looking for a 10 minute breakfast, buy fully cooked bacon. You microwave 5 pieces at a time for 25 seconds and it's done! Cook the bacon, and crumble it on top of the pizza and eggs.


Sprinkle the whole pie with cheddar and/or mozzarella cheese.


Stick the pizza in the oven (even if it isn't 400 degrees yet). Set the timer for 10 minutes. When the 10 minutes are up- Serve and Enjoy!


You can also try:
Sausage, egg and cheese pizza.
Sausage gravy pizza.
Ham, egg, onion and pepper pizza.
Veggie pizza (mushroom, green pepper, red pepper, onion, etc with eggs and cheese)

Monday, August 20, 2012

How we reduced our spending by $23,537.00 in a year. (specific stepsand calculations included)


I'm reviving one of my favorite posts for this weeks link up with Living Well, Spending Less's Thrifty Thursday. You can check them out by clicking here. 

Since we've been married and I began tracking our spending, we've made a lot of changes. None were dramatic, but they led to some pretty dramatic figures. The following list was implemented over time and led to us saving $23,537.00 in the last year. By my opinion, we were already living relatively frugally when I began making changes, so if you aren't already paying attention to how you spend your money, you could easily double this number.

I also think it's important to point out that I don't believe in sacrificing for money. We live just once, I won't use a product that I don't like or cut things that are important to me out of our budget. The goal in budgeting for me is to spend less to get the same thing, or something that works better.


1. Eliminated Eating Lunches out at work, for better packed lunches that save time, calories and taste better.
Savings: $7,200 (70.00 per week per person) - 2,080 (40.00 per week for lunch ingredients) = 5,120.00 saved

2. Began menu planning and strategic shopping using Wegmans online tools to reduce grocery spending.
Savings: $10,400 (200.00 per week) - $6,240.00 (120.00 per week) = $4,160.00 saved

3. Began using the library exclusively and stopped buying books at all.
Savings: $3,600 (about 70.00 per week on average) - 0.00 = $3,600.00 saved.

4. Stopped drinking bottled water and switched to filtered water in reusable bottles exclusively.
Savings: 42.97 per month (from water bottles and deer park delivery - cost of filters, and purchasing high quality water bottles and the occasional gallon water bottle to bring to work to refill) x12= $515.64 saved.

5. Established a home stock room, researched best unit price for all items. Also saved significant time running errands and shopping. Click here for more information on my home stock room and keep a look out next week for me to post my stockroom inventory list including best unit prices.
Savings: $1,357.43 per year. (see next weeks post for specific break down of savings).

6. Cancel cable and use hulu plus for TV exclusively (Jon also hooked up our seldom used desktop computer to the TV so that you can watch the free full episodes on the network sites in the TV).
Savings- $2,220( 185.00 per month) - $1,092 (for epic Internet- 91.00 per month) = $1,128.00 saved

7. Cancelled the Gym membership and began using the community association gym and pool for free.
Savings: $600.00 (50.00 per month) - 0.00 = $600.00 saved.

8. Began using moderate coupons on items I'm already buying.
Savings: 260.00 per year (an average of $5.00 per week)

9. Switched to Suave Rosemary and Mint shampoo and conditioner from Pantene:
Savings: $101.65 per year

10. Signed up for RX by mail through my health insurance company:
Savings: $360.00 (30.00 per month) - $120.00 (10.00 per month) = $240.00

11. Began the $10.00 Christmas Tradition with my extended family.Click here to learn more about that.
Savings: $300 per year - $80 per year = $220.00 saved.

12. Purchased clothing needs at thrift stores and discount stores. (Not exclusively- still a few pieces purchased at retailer).
Savings: $620.00 less spent this year on clothing than last year.

13. Stopped purchasing music on iTunes and began renting all of my CD's from the library (which can be turned into MP3's by hooking up to your computer.) Note: While unenforceable, please delete MP3 after CD is returned to the library to avoid copyright infringement. While no one would ever find out, it's the honest thing to do. Also- No one (except me), even rents CD's from the library, so you can just keep re-renting it if you love it).
Savings: $14.95 per month for Rhapsody and 40.00 in iTunes purchases (approximate- I can't tell from iTunes which is apps and which is music) = $219.40 saved.

14. Implemented a Spending Freeze for two weeks (I'll write a post about this later- you don't buy ANYTHING except absolute necessities for 14 days- it's actually pretty fun!)
Savings: about $400.00 (though this is highly debatable - just my assessment).

15. Cancelled Netflix and switched to Amazon Prime.
Savings: $300.00 per year ($25.00 per month) - $70.00 (also get free 2 day shipping on most products purchased on amazon) = $230.00

16. Refinanced Mortgage to historical low interest rate. (I'm just using our monthly mortgage payment to calculate savings, not savings over the life of the loan which are considerably higher).
Savings: $274 per month: $3,288.00 per year.

17. Talked Jon out of purchasing every single video game that his group of Xbox friends want to play in favor of finding games that have longevity.
Savings: Last year we spent $380.00 on video games, this year we spent $35.00 (Thank you Dayz and Minecraft!)= 345.00


TOTAL SAVINGS IN ONE YEAR: $23,537.00!!!!


Now the challenge is to reduce it by another $10,000 for next year!


If you have any other ways to reduce costs- let me know! Even if you haven't had time to run the math on it - I can help you out with that.


Sunday, August 19, 2012

Recipe: Fried Apple Waffles - 230 calories!

This used to be one of my favorite breakfasts and I recently rediscovered it! We make our own waffles since we have a pretty hardcore waffle iron. I use Krusteaz Heart Healthy Instant Pancake and Waffle Mix (just add water and mix for a few strokes). Once the batter is made, the waffle iron cooks these up in under two minutes. Much quicker than pancakes! If you don't have the time though, you can use frozen waffles as well.

After the waffles are made, I top them with 1/3 cup of Lucky Leaf Apple Pie filling and then sprinkle on a little bit of cinnamon. I serve them while they're still warm. You can drizzle on maple syrup if you want, but it really isn't necessary.


I used to make a chocolate dessert waffle (that I would eat for breakfast and dessert!) by just adding a little bit of cocoa powder to the waffle mix, topping with Lucky Leaf Lite Cherry Pie Filling and then sprinkling with powdered sugar and mini chocolate chip morsels.

Saturday, August 18, 2012

(8-25-12) Freezer Casseroles: This weeks menu plan and shopping list of Freezer Meals

In the past, we've done our menu plan based on 15 minute dinners with a little leeway for fancier dinners on the weekend. You can find links to our 15 minute meal plans and shopping lists by clicking here.

This week everything changes. Our very first baby is due on the 26th of August, but since he could make his appearance any day, I wanted to ensure that our menu plan could survive the unpredictability that we're facing this week. I decided to do freezer casseroles for the entire week. This way, if the baby comes early, we haven't lost any food and we'll have plenty of frozen meals to help us out that first post baby week. Since I've stopped working and I'm at home all day until the baby comes, this also makes really easy dinners for me. Since I don't have to prepare dinner, I can concentrate on nesting and psycho-organizing every detail of the house. As a side note- If you happen to be experiencing nesting, I know your pain. I tearfully told Jon the other day that I HAD to have the shelves mounted in the nursery before baby came. I mean, come on... I can't POSSIBLY raise a baby without installed shelves, right?  Ahhhh.... Pregnancy craziness... How I'll miss you:)

Finding freezer casseroles that I liked was a lot harder than I thought it would be. So that I don't make this an 8 page post, I'll just insert a link to where you can find the individual recipe for the dinner. If you have any of your own favorites- let me know!


Breakfast Options for the Week:

* Since we're both home now, Breakfasts are no longer self serve and have gotten a little more involved. 

Waffles - Homemade on Sunday and frozen for the week. I use Krusteaz Heart Healthy Instant Pancake Mix. This can be served with bananas and walnuts, lite apple pie filling, or butter and syrup. To heat- Microwave for 90 seconds.

Milk and Cereal- Self explanatory.

Breakfast Pizza- Pre-made Pizza Crust (we use Wegmans'), topped with 4 scrambled eggs, crumbled bacon and shredded cheddar or mozzarella cheese. Sometimes, I add green pepper and white onion. Bake at 400 degrees for 5-10 minutes (just melt the cheese and get the crust to a crispiness that you like). P.S. This is a HUGE hit with bacon loving husbands.

Fruit and Yogurt: Wegmans Vanilla Super Yogurt rocks my world! Cut up any fruit we feel like- Bananas, Apples, Pears, Pineapple, melon, grapes etc, top with a few spoonfuls of super yogurt and then sprinkle with Wegmans vanilla granola cereal.

Omelets: Eggs, Cheese, and whatever leftovers I have: Broccoli and cheese, ham and cheese, fajita vegetables, tomatoes and feta. whatever strikes me:)


Reminders for the Week:

Baby can come anytime this week. (Like I need a reminder!)
Sunday: Jen, Levi, and Kori come for dinner. Invite Manny and Blake in case they are off. (Total Guests- 5-7 people: push tables together)
Tuesday: Rochelle's funeral. Make a casserole and cupcakes for the family. 
Thursday: Prenatal Doctors Appointment- Pack something to eat in the car to avoid the siren call of Chipotle.
Pick up cat treats for kittens to help with baby jealousy.


Menu:


Sunday:
Breakfast: Cinnamon Buns, fruit with super yogurt and granola.

Lunch: Jon- Turkey and Muenster
             Rowy: Grilled chicken sandwich, chips and guacamole.
Dinner: (Dinner Party) 5-7 people. 2 pans of Lasagna (keep one frozen as a back up), french bread, mixed greens, homemade mozzarella sticks with marinara sauce.

Monday:
Lunch: Jon- Turkey and Muenster or leftovers.
            Rowy- Baked Potato with broccoli and cheese. (Make extra plain baked potatoes for dinner tonight)
Dinner: BBQ Beef Filled Biscuits freezer casserole found here , Baked Potato, Baked Beans.

Tuesday:
Lunch: Funeral- Reception. Make and bring Freezer Casserole- Chicken and Sun dried Tomatoes (make 2 and leave one in freezer for later), recipe found here. Make and Bring Cupcakes.

Dinner: Creamy Chicken Pot Pie Freezer Casserole, recipe found here.

Wednesday:
Lunch: Jon- Turkey and Muenster
            Rowy: Chicken Salad Sandwiches (waldorf salad if there are any apples left)
Dinner: Freezer Chicken Enchiladas, recipe found here.

Thursday:
Lunch: Jon- Turkey and Muenster, or leftovers
             Rowy- Grilled Chicken Salad
Dinner: Tator Tot Casserole, recipe found here. Cauliflower and Cheese Sauce

Friday:
Lunch: Jon- Turkey and Munster, or leftovers
Rowy: Chipotle- Style Home made burrito bowl: Just make minute rice, saute green pepper and onion, dice chicken breast (homemade this week, but normally I use frozen grilled pre cooked chicken filets), salsa, cheese, and sour cream. Mix together in a bowl.

Dinner: Baked Penne, Ricotta and Sausage freezer casserole, recipe found here.

Saturday:
Breakfast: Breakfast Bake freezer casserole, recipe found here.

Lunch: Hamburgers on grill (hand formed pre-frozen patties, and frozen buns - wrap buns in aluminum foil and place in gallon sized plastic bag before freezing. Place foil wrapped bun on indirect heat on grill while cooking hamburgers. Buns come out perfect every time!)

Dinner: Freezer Sloppy Joe's, recipe found here. Freezer Mashed Potatoes, recipe found here. Steamed Carrot Coins (from frozen veggie bag).


** Since I'm not working, and not even remotely up for a marathon cooking session, I plan to break these up into three days. I can shop for ingredients (except dry ingredients- I'll do that all at once) the mornings that I cook so that they stay fresh. **

Shopping List:

** I also went and bought 15 disposable casserole pans from Party City for $.69 per piece. This will help with the post baby period as well, since I won't have to clean casserole dishes all week.


Wegmans: (Prices current for my local Wegmans)

Wegmans Club Pack Turkey Breast- $8.99
Wegmans Muenster Cheese- $2.49
2 loaves of Wegmans Bread- $1.60
Hellmann's Mayonnaise- $3.99
Club Pack Ground Beef - 6 pounds- $12.00
3 Jars Wegmans Pasta Sauce- $3.00
1 Jar of Marinara Sauce- $1.00
3- Four Cup Bags of Mozzarella Cheese- $11.00
4- 15 oz Ricotta Cheese- $8.00
2 Oven ready Lasagna Boxes- $2.50
1 Tube of French Bread (Simply line?)- $2.89
Club Pack of Mixed Greens- $3.99
2 Blocks of Mozzarella Cheese- $6.00
2 Cartons of Eggs- $5.00
2 Containers of Sour Cream- $2.80
3 Packages of Cream Cheese- $4.50
Bacon- Regular- $4.79
Frozen Broccoli and Cheese- $1.69
Refrigerator Biscuits (Simply Line?)- $1.99
Cheddar Jack Shredded Cheese-$1.79
3 Pounds Penne Pasta-$3.00
6 Boneless Skinless Chicken Breasts- $3.69
Milk- $2.51
1 cup Oil Packed Sundried Tomatoes- $6.99
Frozen Mixed Veggies- $1.99
Philly Cooking Creme- Savory Garlic $2.69
Ready to Use- Fridge Pie Crust - $2.79
1 Whole Chicken to Roast-$4.00
1 Club Pack of Tator Tots- $5.99
5 Cups Cheddar Cheese Shredded- $3.49
1 Pound Sweet Italian Sausage - No Casings- $4.49
Ground Fennel- $1.99
1 Pound Pork Sausage- $3.69
Club pack of Hamburger Buns: $1.99
2 packages of Burrito Tortillas- $4.00
2 Bags of Mexican Cheese- $7.00

Total Cost of Wegmans Trip: 148.69


Aldi's: (Prices are approximate based on memory)

Apples- 5 Lb Bag: $3.00
Tortilla Chips: $1.00
Cucumber- $.50
Bread Crumbs: $1.00
13 Baking Potatoes (Value Bag?) $4.00
1 Red Pepper: $.50
Celery: $1.00
2 Cans Diced Tomatoes and Green Chillies: $1.00
4 Cans Condensed Cream of Chicken Soup: $2.00
Large Bag of Green Peppers: $3.00
Salsa: $1.00
Can of Tomato Puree $.50
3 White Onions: $1.50
2 Cans of Tomato Sauce: $1.50

Aldi's Total: $21.50

Total Cost of Groceries this week (Including freezer stock up): $170.19
I went over our normal $120.00 per week, since These meals will feed us more than once, I'm hoping to save 3 casseroles for next week (although I'll still make more if baby hasn't shown up yet), to give us a frozen casserole surplus.

Ingredients Already At Home:

Cinnamon Buns
Super Yogurt
Vanilla Granola Cereal
Frozen hamburger Buns
Frozen hamburgers
Lots and Lots of Guacamole
Onion Powder
Pizza Crust
6 Eggs
Instant Pancake Mix
Syrup
Ketchup
Baked Beans
BBQ Sauce
Cupcake Mix
Frosting
Parmesean
Cumin
Chili Powder
Garlic Powder
Dried Oregano
4 Filets of Grilled Chicken
Ranch Dressing
Italian Dressing
Frozen Cauliflower
Minute Rice
White Onion
Olive Oil
Minced Garlic
Bay Leaves
Carrot Coins

Friday, August 17, 2012

Saving Money through RX by Mail Programs

We've been blessed medically so we weren't used to having to track or pay for regular prescriptions. When Jon and I decided we wanted to start a family, my doctor gave me a prescription for prenatal vitamins. I was paying $30.00 per month for the prenatal vitamins (with health insurance!) and hated to have to refill the prescription every month. It added to my errands, and wasn't exactly fun.

I knew that you could do prescriptions by mail, but didn't know how. I called the number on the back of my heath insurance card and asked how I could fill prescriptions via mail. They explained that they have their own mail order program. I just give them my prescription info, they transfer the prescription for me and I now have my prescription mailed to me every 90 days. I pay $30.00 (with flexible reimbursement so that money is actually tax free- more on that later) every 3 months now and save $240.00 per year! It automatically refills the prescription when I should be running out, so I don't even have to remember to order more!

If you have a regular prescription filled then consider this as a great source to save money and time. Just flip over your health insurance card, give the customer service line a call and see what they have to offer.

Wednesday, August 15, 2012

The First and Second Step to Reducing Debt (and most important!)

If you have credit card debt, there are a few steps that are absolutely essential for you to dig your way out.


1. Sit down with a pen, a piece of paper, your wallet and a phone. Get comfy- You're going to be there a while. Write down the name of every credit card in your wallet. Call up the number on the back of each card and find out your interest rate, your balance, and your minimum monthly payment.


1a. Take another sheet of paper and list the credit card's in descending order by interest rate, the highest being at the top. Click here to go an online calculator to determine how much you are paying in interest every month. Enter each credit card's info into the calculator, (leave the % column blank- just enter the minimum payment). It will present you with a chart of how long it will take to pay off that loan and the interest you will pay each month on the card.


1b. Add up the monthly amount paid in interest for one month for each card. Look at that figure. I'm guessing its in the hundreds. You're paying that every single month for the privilege of buying things you can't afford. If you had that money back every month, what would you do with it? Once you realize how much your spending just to own those credit cards, it will be much easier for you to avoid the temptation of using them.


2. Call back the credit card companies one at a time. Ask each one if it will consider reducing your interest rate. Be pleasant, charming, and adorable. Do this even if you have bad credit. Do this even if you have horrible credit. The worst that they can do is say no. Mark down the new interest rate for any reductions. If they say no, get a free copy of your credit report at annualcreditreport.com by clicking here. Find out what your negatives are: do you have a high credit to debt ratio? Do you have late payments? Work your butt off for the next 6 months to increase your credit score (myfico.com). Call each credit card back in 6 months and ask again.


These are the first two steps to financial freedom. There's more to come, but handle these first.

Tuesday, August 14, 2012

Texas Hold 'Em Poker Tournament Party: Amazingly Fun and Ridiculously Cheap! $31.00 for the whole party!

My absolute favorite party to throw is a poker party. It's such an awesome night. You can mix social circles that would ordinarily make for an awkward party, put them at a poker table together and suddenly everyone is best friends for life. By making it a tournament, you're teaching those new to the game how to play in a tournament in case they ever have any interest in playing in a casino, you're donating $10.00 to one of your friends (or yourself!), and your giving people an opportunity to gamble $100,000 (in chips of course!). It's also an incredibly frugal party, My budget for poker parties is $50.00, but I normally spend much less than that.

Here's how I make it work:

1. Know the Law!


If you don't check beforehand, it's unlikely that the local SWAT team will raid your house (and if they did, you up your party reputation significantly). However, being the law abiding citizens that you are, just call down to your local police department and ensure that a poker party is ok as long as "the house" (you), doesn't make a profit. That's the law in most places (including here). If you want to get really fancy, the house can count lodging, food, drinks and entertainment provided for free against the profit. So technically, you could make a profit as long as you can prove that you spent more than you made.

2. Pick your Guest List:


Ultimately, you want to have a group of 5 to 10 players. Choose 10-12 friends to invite and let them know the details. Make sure to tell them the time (normally after dinner, about 7 or 8pm), the date, the place, the buy in (we do $10.00), what the buy in gets you ($100,000 in chips) and if it's winner take all or tiered winnings. Winner takes all means that whoever is the last man standing, gets everyone's money. Tiered winnings means that the last 3 people standing get some money. If you have 10 friends, with a $10.00 buy in, you have a total of $100.00. With tiered winning, the 1st place winner would get $50.00, the second place winner would get $30.00, and the third place winner would  get $20.00. Since we keep our buy in so low, we just go for winner take all. When you send out your invites (by invites I mean text messages, this isn't really formal), also let them know that if they don't know how to play, there will be a tutorial before the game.

3. Count your Chairs:


You can have up to 10 people at one table, but make sure you have enough chairs in the house to seat everyone. If you only have 8 chairs in the house, just adjust your invite list to 8.

4. Buy Drinks:


You have two options, alcohol or no alcohol. I don't drink, but Jon does. If we do something non- alcoholic, we mention that it's BYOB. I grab a case of Dr. Pepper and a case of Coke in a 2 for $5.00 deal and we call it a night. If you end up doing alcohol, I suggest just picking a signature mixed drink to make. It's cheaper, easier, and you won't spend the next day picking up beer bottles. Since I don't know a margarita from a martini, I won't try to advise you on a good signature drink.
Total Cost: $5.00


5. Buy Snacks:


Think simple, easy, and not too messy! You're looking for snacks that people can get up, grab quickly, take back to the table and enjoy without having to juggle with their cards. I found these on pinterest (for the original post... Click here) and fell in love!  I went to Party City and bought tiny plastic disposable shot glasses for about $2.00. I don't remember how many came in a pack, but I've used them for 2 parties and still have some left. Bonus points because they come with tops, and you can use the extras in your lunch box to add dips and sauces.

I bought a bag of baby carrots ($1.29), a bottle of ranch dressing ($1.29), a bottle of blue cheese dressing (1.29), a can of honey roasted peanuts ($5.00), and a bag of pretzel sticks ($1.00). Squirt ranch or blue cheese in the bottom of the shot cups, add carrots on top. Separate the peanuts into the cups, separate the pretzels into the cups, add peanut butter to some of the pretzel cups. Have a plate of cookies available (if you don't have time to go all Betty Crocker- buy a mix for about $1.50).
Total Cost: $14.00


Buy Poker Chips:


You're only buying this once, so get a decent set that will last you a long time. You need 35-50 chips per person. Unless you have a lot of chairs and multiple dining room tables, its unlikely you'll ever have more than 10 people, so aim for 500 chips. We got ours at Walmart (frugal capital of the world). A similar set can be seen by clicking here for $39.99. I don't count this into my $50.00 budget, because we already had a set, and you'll only need to buy it for the initial party. This set also comes with 2 decks of cards (almost all chip sets do). We keep using the same decks of cards, but if you have a friend that always seems to be "that guy", invest the extra $2.00 in a new deck for each party so he can't say your cheating.
Total Cost: $39.99 for initial party.


Ensure That You Have 2 Decks of Cards:


Make sure that you have two decks of cards. You're only going to use one (trying to swap and use a second while the first is being shuffled is an invitation to have mixed decks), but you want the second as a back up in case something happens. Keep one deck in its wrapper, ask at the beginning if everyone feels comfortable using the old deck, if anyone wants the wrapped deck- use that one. It's never happened to us, but in the unlikely event that you end up with lots of opened decks, donate them to the neighborhood kids.
Total Cost: $2.00 if you don't already have an unopened deck.

Have Change On Hand:


We live in a plastic society. When you tell people to bring $10.00 for the buy in, almost all of your guests will show up with a 20 dollar bill because that's what the ATM gives them. Stop by your bank on the way home one night that week, and get a bunch of ten dollar bills to make change.

Determine Denominations:


Determine how much you want each chip to be worth. Take one of each colored chip, write the denomination on it and glue it to cardboard (or anything- paper plate, block of wood, whatever). Put it in a place where everyone can see it easily.

We use the following denominations:

White- 500.00
Green- 1,000.00
Blue - 5,000.00
Red- 10,000.00
Black- 25,000.00

We distribute a total of $100,000.00 for the buy in to each person.

Find a Bank:


Grab an old mason jar, coffee can, mug, or vase to use as a bank. When people buy in, they put their money in the "bank". It's just a nice neutral place to keep the winnings. Plus, it's kind of cool to be handed a giant jar of cash when you've won. If you want to sweeten the deal, stick candies, and other treats in the jar with the money, stick a ribbon around the jar and let them take the jar home as well (bonus points for you since now you're decluttering while you host!).

Learn The Rules:


Even if you know the rules (or think you do), do a little research. You want to make sure you know what your talking about since you'll be teaching other people. You can click here for more information about the rules of Texas Hold Em Tournaments.

Have a Practice Round:


Unless everyone is sure they know what they're doing, have a few slow tutorial rounds, encourage questions and make sure that everyone knows the rules before any money is stuck in the bank.

Increase the Blinds at Allotted Time:


Tournaments can take a while depending on your players, the soonest you'll be done is 3 hours with 10 people. It can go on much longer though. At the last poker tournament, I was so exhausted that I went all in on a pair of 8's just to be able to get out. Then I fell asleep on the couch and awoke at 1 am to find the party still in full swing (caution- this is not great hostess behavior). If you increase your blinds at allotted pre-determined times, you can avoid that situation. For example, every half hour, you can increase your blind by three. Start off with a 500.00 blind, at the 30 minute mark, increase to 1,500, then 4,500 and so on.

Have Alternate Entertainment for When You're Out:


The first person that goes out always becomes the dealer, since there's no one else for them to mingle with yet. When the second person goes out, we normally have them alternate dealing. After that they move to some alternate form of entertainment. We have a few standby's: kinect on the xbox, bean bag toss in the back yard, or a "2nd Winners Table" (an optimistic way of saying losers table), where you enter a free tournament for a prize (this can be anything from a real gift, to baked goods to take home, to something silly like a cardboard crown decorated in feathers). Just have something for people to do that requires little direction since (hopefully), you'll still be in the tournament.

Keep a Low Buy In:


There's always one guy in every crew, the guy that's ultra competitive and freaks out over a novice dealing the wrong way or an accidentally flipped over card. There really isn't anything you can do about "that guy", but if you keep a low buy in, at least you aren't fueling that type of behavior. Most people won't take this very seriously if it's just $10.00. This is about having fun, and learning a  new skill together. As a bonus, one of you will leave with about a hundred dollars.
Total Cost: $10.00

Total Cost for Party: $31.00! (Except for First Party, if you don't have poker chips, then you'll need $71.00)

Monday, August 13, 2012

Living Room Snack Station: (and how to adjust your program when needed).

Last week was an epic fail. I'm 38 weeks pregnant. We live in a 3 story townhouse that feels like a mansion when you have to go from the bottom floor to the top. For about three days last week, I slept less than 5 hours a night due to the pains in my pelvis. I was exhausted. Jon helped out a lot by taking over my chores, then we would sit downstairs in the living room with me propped up on about a million pillows with my feet up. Twice last week, during these days I'd end up starving at about 8pm. When I say starving, I mean starving... Like, I could eat a cow raw. There was 0% chance of me going upstairs to make something (even though there were plenty of options), and Jon was just as tired, considering he works a crazy schedule and had to do most of the chores those days. So, when I casually glanced over and said "We should order pizza...", he readily agreed despite having eaten dinner just 3 hours before.


Now, I'm not an expert on prenatal nutrition, but I strongly suspect that pepperoni pizza and cinnastix aren't really beneficial to our unborn child right now. Not to mention, we wasted $60.00 on something that didn't give us any pleasure at all. If this had happened once, no sweat. But TWICE in the same week? We had ourselves a problem. I didn't beat myself up about it, but I did brainstorm to try to think of ways to prevent the same thing happening in the future.


I could have easily said "Next week, if I get hungry I'm going to walk upstairs and make something healthy", but I know that's not going to happen. I have to plan to handle myself at my laziest. So, I assume that I won't be able to change how I feel during those moments, and that I won't be able to alter my willpower and came up with a workable solution.


We had a mini fridge that Jon bought on clearance for about $30.00 at Walmart a few years ago. It was sitting unused in our bedroom from when we used to keep individual water bottles stocked in it. Jon brought it down to the living room for me, and I added a few healthy filling snacks to our grocery list this week.


We now have a mini fridge right next to the couch stocked with Stacy's pita chips, red roasted hummus, containers of chocolate milk, trail mix, clementines, pears, apples, baby carrots, ranch dressing and cheese cubes. We had mini paper plates, plastic cutlery, and napkins left over from the baby shower so we set those up as well.


Now when that 8pm starvation hits, my lazy future self will choose the path of least resistance. Much easier to grab those snacks than to call for pizza, find my wallet to pay, walk up the stairs to get the pizza when the delivery guy comes, and have to wait 45 minutes to an hour to eat. Hah... I've tricked myself! If I can parent baby Groner as well as I parent myself...We might just make it through this!

Sunday, August 12, 2012

40 Bags in 40 Days: Decluttering Project

Recently, I saw a post here about decluttering 40 spots in your house over 40 days. I love the idea, Fly Lady has had me doing that in 15 minute increments for the past few years. I like this idea even better because you have an easy plan to follow. Just grab an old grocery bag, hit the area for 5 minutes and throw as much stuff out as possible. The idea isn't to clean the area, it's easy to get overwhelmed if you try to do both decluttering and cleaning. The important part is to remove as much as possible so it's easy to clean later.

If you're organizationally challenged, you have two options to get this stuff out of your house. The first is to stick it right into the trash. Not exactly eco friendly- but you're in crisis mode. If you try to donate this stuff, it's going to sit in a closet for a few more years and you're going to give up. If you can't stand the idea of throwing it out, jump onto craigslist and list under the free section- "Miscellaneous Bags of Free stuff. Major Decluttering project. 40 bags available of assorted goodies. My loss is your gain! Bags will be out front at 6pm tonight." You can list your address, or if you're not comfortable with that, a public location close by (the end of your road maybe?). If you leave it somewhere other than your property, attach a free sign and come back in a few hours to make sure its been picked up. We've done this several times and it's always a great experience. Before we moved, we emptied half of our house onto the front curb and people were circling the block HOURS before the pick up time. Every single thing got picked up. Jon's gotten his fair share of free stuff off of Craigslist so we think of it as our way of giving back.

As a bonus, once you start throwing out everything in your house and you start feeling so much better, it easy to break the shopping addiction. You start looking at things in stores that you would ordinarily snatch up and think, "eh. I'm just going to throw it out in next months decluttering". Once things gets cleared out, it's really easy to organize the things that you actually use.

This is my personalized list:


40 BAGS IN 40 DAYS

***************************************


1. Laundry room

2. Kitchen silverware drawer

3. Utensil drawer in kitchen

4. Utensil cup in kitchen

5. Under the kitchen sink- left side

6. Under the kitchen sink- right side

7. Refrigerator

8. Spice cupboard

9. Freezer

10. Bookshelf in entryway

11. Closet- my clothes

12. Closet- Jons clothes

13. Dresser drawers

14. Nightstand drawer in bedroom

15. My jewlery box

16. Headboard

17. Underneath master bath sinks

18. Upstairs guest bath under sink

19. Craft room's bookshelf

20. Craft room closet- right side

21. Craft room closet- left side

22. Sewing table desk shelves

23. Trunk of my car

24. Car

25. Pots and pans cabinet

26. Kitchen cupboards

27. Hobby closet

28. Top shelves of office desk

29. Office desk

30. Underneath office desk

31. TV cabinet drawers

32. Tool cabinet

33. Spare closet (where the water heater is)

34. Entry basket

35. My purse

36. Underneath downstairs bathroom sink

37. Financial Files

38. Craft room scrapbook area

39. Bookshelf in downstairs spare bedroom

40. The gardens

Saturday, August 11, 2012

(8-18-12) This weeks menu plan and shopping list of 15 minute meals ($120.00 grocery budget per week)

Each Week, I sit down with my schedule book and plan out this weeks meals. Breakfasts are serve yourself from pre-made options, and snack bags for lunches are separated into snack baggies on shopping day (Sunday). I just grab 3 snack baggies for each of our lunches to toss in. We both pack our lunch every day, but I avoid luncheon meat since I'm pregnant. I often take leftovers from the night before since I now have a desk job with access to a microwave. I shop on Sundays, and then do food prep that day for the week. I share our menu for the week for those that are new to menu planning. If you have no idea what to do for the week and would like to steal some or all of our plan... I promise not to prosecute:-)

As always, I feel it's important to note that this is not the healthiest plan to follow. It's a great plan for us, because it's breaking our addiction to fast food and other unhealthy habits, and it's cut our food budget by about 50%. Slowly, we're making substitutions that will lead us to a healthy cheap meal plan. Rome wasn't built in a day and all that jazz.


"Recipes" for all menu items can be found here and here.


MENU:


Breakfast Options for the Week:


Heart Healthy Pancakes: We normally use the instant heart healthy mix by Krusteaz, but Jon has informed me that he can't ingest "instant" pancakes. He's been kind enough to offer to make me Pancakes from the Joy of Cooking Cookbook.  You can find the recipe here.

Apple Cinnamon Muffins- Made from a mix we have in the pantry. These are to replace the bagels and cream cheese for Jon to take to work in the morning.

Milk and Cereal: Self Explanatory.

Heart Healthy Pancakes wrapped around a link of turkey sausage for Jon on the way to work.


Reminders:

Sunday: Batman in the morning, lunch right after at home.
Add a pencil sharpener to list. Check Target back to school sales- If notebooks are a good price, head there to get sharpener and grab notebooks too.
Depending on how Saturdays Freezer organization project goes- make another freezer casserole for baby's arrival.
Add snacks for hospital to grocery list and add to maternity bag for Jon.
Add 3 or 4 small HEALTHY snacks for mini fridge downstairs. (This is because I'm starting to get really really hungry and really really tired at around 8pm. If I have carrots and apples and string cheese available without having to trudge back up the stairs, I'm in a much better position to not call pizza hut.)
We're out of ketchup:(


Sunday:

Breakfast: Scrambled Eggs, Home fries, Sausage, Banana
     Lunch: Wegmans Salad Bar (we've got movie tickets for 10:30 am, so we'll head to do the shopping right after, but we're going to be starving.)
     Dinner: Renee Wilson's BBQ Chicken Stuffed Potatoes (Thanks for the comment Renee!) Recipe copied from comments on "3 Weeks of Cheap, Easy Dinners", with green beans.

** Jon makes Pancakes and freezes them**
** I make Apple Cinnamon Muffins and brownies**
**Freeze Hamburger Buns**
** Make Taco Seasoning Mix... Found here**
                                   
Can you stand another recipe idea? My family loves this and it is fast:

(To serve 2 adults and 2 kids)

Boil 3 medium sized chicken breasts (or the equivalent amount of bone-in chicken if you prefer). While those are going, microwave 4 medium potatoes (usually 4-5 minutes, turn and repeat). When the chicken is finished cooking, shred and mix in BBQ sauce. Cut open the potatoes (dress with butter, salt and pepper if you like), and top with BBQ chicken. Sprinkle with cheddar cheese if desired. I usually serve this with some green beans or broccoli and it goes over very well. And it is fairly healthy, particularly if you go easy on the butter or use a light alternative. Thank you for the ideas!

Monday:

Lunch:
          Jon- Ham and Cheese, Leftover Chicken and Potatoes
          Rowy - Leftover Chicken and Potatoes (T.V. Dinner as back up), Clementines
     Dinner: American Style Mediterranean Plates : cubed grilled chicken (use Tyson's frozen if you don't have extra from Sunday), bbq sauce in a dip cup, cubed pears, cubed apples, cubed pineapple, super yogurt, vanilla granola, baby carrots, fresh broccoli, southwest ranch dip, hard roll with butter. 

Tuesday:

Lunch: Leftover Mediterranean Plates 
Dinner: Chicken Salad Sandwiches, Apples, yogurt and granola.


Wednesday:

Lunch: Italian Chicken and Pasta Salad
Dinner: Swedish meatballs with Egg Noodles

Thursday:

Lunch: Italian Chicken and Pasta Salad
      
Dinner: Soft Tacos, Salad with Southwest Ranch

Friday:

Lunch:
Jon: Ham and Cheese Sandwich, or leftovers.
Rowy: Leftover Tacos (T.V. Dinner as back up)
     Dinner: Grilled Steaks and Macaroni and Cheese 

Saturday:

Breakfast: Milk and Cereal
  
  Lunch: Hamburgers, Baked Beans and Carrots
    Dinner: Slow Cooker Terriyaki Chicken Thighs (from Taste of Home): Recipe can be found here.
     Served with stir fry vegetables and rice.  


Downstairs Snacks for Mini Fridge:

String Cheese
Carrots and Ranch Dip
Hummus and Pita Chips
Apples

** Also bring down a selection of napkins, small paper plates, and plastic spoons from kitchen stockroom**


Snacks for Jon at Hospital:

Cheese its
Beef Jerky
Donut Sticks
This is Jon's List - If anyone has any ideas on stuff to pack- let me know!


SHOPPING LIST


Clementine Oranges, 2Lb Bag 3.99
Extra Large Green Peppers 1 Lb 1.99
Golden Pineapple 3.99
Small Celery 1.69
2 bags of Wegmans Baby Carrots- 2.60
Wegmans Fresh Garden Salad - 1.29
D'Anjour Pears -1 Lb 1.79
Fuji Apples 1 Lb - 1.79
Russet Potatoes - 4 Lbs- 3.16
T Marzetti Veggie Dip, Southwest Ranch- 3.29
Cleaned and Cut Broccoli Florets  2.00
White Onions 1 Lb - 1.49
2 Loaves Wegmans Homestyle Bread - 1.60
Wegmans Hamburger Rolls 18 pack- 1.99
Banquet Turkey Sausage - 1.29
Wegmans Club Pack of Chicken Thighs 6 Lbs- 6.00
Wegmans Ground Beef Club Pack 12.00
Stacys Pita Chips- 2.79
BP Ground Ginger (International Aisle)- 1.99
UPstate Farms Buttermilk- 1.69
Eggs Club Pack- 36 eggs- 2.53
Wegmans Provalone Cheese- 2.49
Wegmans Fat Free Milk - 2.51
Hummus Roasted Red Pepper - 1.99
2 bags Wegmans Sharp Cheddar Cheese - 3.60
Wegmans Taco Tortilla .99
Wegmans Super Yogurt Vanilla- 3.79
Wegmans String Cheese - 12 sticks- 3.79
Wegmans Thin shaved Ham - 2.99
Healthy Choice Cafe Steamers - General Tso Chicken - 3.29
Tyson frozen chicken Breast Fillet- 6.99
Healthy Choice Top Chef Cafe Steamers - Ricotta and Spinach Ravioli and Chicken Marinara - 3.29
Wegmans Rainbow Rotini - 1.19
2 bottles of Heinz Tomato Ketchup 40 oz- 1.99 (buy 2, because for limited time, 40 oz is same price as 20 oz)
Wegmans Brown Sugar BBQ Sauce - 1.99
Wegmans Italian Dressing- 1.69
2 Bottles Wegmans Creamy Ranch- 1.69
Wegmans Apple Cider Vinegar - 1.89
Wegmans Macaroni and Cheese- .39
Jack Links Original Beef Jerky- 5.49
Ritz Bits Cracker Sandwiches with cheese - 2.99
Wegmans Cinnamon Squares Cereal- 1.99
Little Debbie Donut Sticks - 1.99
Beef Gravy- .99
Sour Cream- 1.39

Total Cost: $119.96

ALREADY HAVE AT HOME:


Flour
Baking Powder
Salt
Oil
4 Eggs
Butter
Apple Cinnamon Muffin Mix
Home Fries
Hamburgers
Vanilla Granola
Wegmans Shaved Ham
Frozen Dinner Rolls
Turkey Meatballs
Egg Noodles
Sour Cream
Frozen Steaks
Baked Beans
Stir Fry Vegetables
Rice
Frozen carrots
Frozen broccoli
Frozen Cauliflower

Chicken Salad Sandwiches


Italian Chicken Salad

Mediterranean Plate