Showing posts with label DIY/Crafts. Show all posts

Monday, August 25, 2014

DIY Project - Kid Proofing Your Dining Chairs in 30 min, for $4.00


Recently, while visiting friends, we noticed that they had an immaculate house despite having 3 kids under the age of 4. How is that even possible? We had long given in to the idea of not having nice things until our youngest is about 7.

One of the dirtiest parts of the house is our kitchen chairs. At 2, our little Squishy is old enough to sit on his own and eat, but man does he make a mess! (Okay, part of this is our fault for having dining chairs with white cloth bottoms). Our friends have absolutely beautiful dining chairs that they covered the bottoms of in clear vinyl. When the kids are old enough, just remove the vinyl. 

This project took us about 20 minutes for 4 chairs and cost about $8.00 (you shouldn't spend more than $4 though!) buy your clear vinyl from either the walmart fabric department or at Joanne's using the 50% off coupon they send out every month. This was a last minute idea for us and we rushed out to get the vinyl without price checking. 

The vinyl wipes off so easily! Even if you forget to wipe the chair right after the meal and the food dries. 
If your fabric chairs are already gross, remove the fabric and wash. Then cover with vinyl. Worst case scenario is that the fabric won't come clean in which case you spend another $4.00 on new fabric.

Needed Items:

Screwdriver
Vinyl - about 1 yard for 4 chairs
Staple Gun - not absolutely necessary but it will make this really easy.


This is so easy, it barely needs a tutorial. Just flip your chair upside down and see how the fabric seat is attached. In this case (and all Ikea chairs) there are 4 screws that connect the seat to the chair. Unscrew those and remove the seat. The fabric is attached by an elastic string. If you want to wash it, peel it off and throw it in the wash. If it's still new and clean, grab your vinyl (we didn't even measure, just eyeballed it- 1 yard of vinyl did 4 chairs with quite a bit extra left over) and fold it around the seat, stapling the edges to the wooden back of the seat.


Then screw the seat back onto the chair and you're all set! It was super easy. It took us less than 30 minutes to do all 4 chairs (most of that was time was trying to hunt down the staple gun). They look great and stains wipe right off. Now if only there was a way to protect the wooden chair back from Squishy's maple syrup covered hands.


Loved this post? Like me on facebook by clicking here and make my whole day better!

Sunday, September 30, 2012

Candle Lanterns: A Cheap and Beautiful Outdoor Lighting Option

Recently, I was visiting our neighbor Joel and was really impressed with his back yard. We live in a townhouse community and he had fenced in his backyard. He lined the fence with tealight lanterns for outdoor lighting. I adore this look! Especially for get together and parties. Absolutely gorgeous and so frugal!

Ikea sells the Rotera lantern for tealights for $3.99 per piece. They are suitable for outdoor use and can be purchased here. They also sell Glimma tealights in packs of 100 for $3.99, which can be found here. If you have extra money or time to shop around, they come in many different styles that evoke memories of the eastern shore or Morocco depending on your tastes.

 
ROTERA Lantern for tealight IKEA Suitable for both indoor and outdoor use.
                                         Ikea's Garden Tealight lantern

Monday, July 30, 2012

DIY: Dry Erase Boards and the Ikea "As-Is" Aisle

Ikea is one of my favorite stores. It's the only place that I've found that can beat even Walmart on kitchen gadgets. I've always been impressed with their products (as long as you have a basic understanding that you aren't purchasing heirloom pieces). I love the way that they think outside the box and come up with ingenious designs.

Recently, we needed to pick up a shelf for the baby's room. We headed to Ikea and picked out the lack wall shelf in white for $14.99. When we headed toward the checkout, we made our usual stop to the "As-Is" aisle. The "As-Is" aisle is an elephant graveyard for ikea rejects. They have everything including damaged goods, discontinued items, show room or display models, and random parts of furniture. They have a tall shelf in the corner that has doors, table tops, and pieces of wood. They had several base pieces of chairs (the rolling parts). They even had a GIANT backyard gazebo tent that was discontinued for $75.00!

To be perfectly honest, I have always stopped at the "As-Is" aisle, but before I started bringing Jon, most of it was lost on me. I couldn't figure out what any of the pieces were or what to do with them. Last time, I brought Jon and he grabbed a really cool lighting fixture for $10.00. He knew exactly what he needed and where in the house we had a closed fixture outlet where it could be installed. The result was great and I'm thrilled he could do it for only $10.00!


This time, we found a pile of discontinued white corner shelves for $5.00, that worked even better for where we wanted to install the shelf so we grabbed two of them so we could stack them. We put the lack wall shelf back.


Jon found two high gloss white boards that appeared to be parts of a larger piece in the cabinet of boards. He recognized that they could be used as dry erase boards because they were covered in the blue sticky protective film. There was a very large board for $3.99 and a smaller board for $1.99. We  took them home and set the large one up in the kitchen as a Menu Board, using command adhesive to adhere to the wall. The smaller one, we'll set up in the nursery.


For an example of the savings... This dry erase board is being sold at Staples for $45.99


Quartet® Contour® Melamine Dry-Erase Boards with Textured Plastic Frame, 3' x 2'

  • Standard melamine surface
  • Textured plastic frame with rounded-corners
  • Dimensions: 3'W x 2'H
Price:
$45.99

The next time you're in Ikea, stop in to the "As-Is" aisle to see what can be used! You can also check out the Ikea Hackers site for inspiration by clicking here.

Tuesday, July 17, 2012

Saving Money through Pinterest Projects

I can still remember the day I found out about pinterest. It was described to me as an online pin board where you can pin the things you like. Honestly, it sounded like something that I would download onto my iPhone, play with for a week and then delete. I forgot about it shortly after hearing about it. At some point, I went to download it out of sheer boredom and found out that I couldn't join without an invite. This led to a 12 hour search of mass hysteria where I contacted every single person in my life (or former life, or that I once ran into at a party, etc) trying desperately to find someone who had an account that could invite me. The longer I spent trying to find someone, the more obsessed I became. I still wasn't even completely sure what it did, but I knew I had to have it. I finally started leaving comments on blogs that referenced pinterest asking for an invite. 12 hours later, I was in. Thankfully, pinterest was worth the wait. I mention this because if you're in the same boat I was (though I doubt it as pinterest is much more mainstream now), leave me a comment asking for an invite and you'll be my first priority. Don't forget to leave your email in the comment.

While spending hours looking through crafty people's inspiration is heaven on earth, we're not actually saving money unless we start doing the projects we see. More importantly, unless we start doing the projects that we need, or that replace things that we would have to spend money on. For instance, how many people joined pinterest, pinned like crazy and started doing ridiculously expensive projects that required a ton of time and equipment we didn't already have. Yeah, that would be me. There's nothing wrong with that if your looking at it as entertainment, but if you're trying to save money than let me introduce you to a different way to pin.

When I found out I was hosting thanksgiving dinner for 8 people, I wanted a way to make it special but frugal (without resorting to the dollar store paper turkeys). I had a few challenges though. I didn't have a large table, or enough chairs, our dinner plates were purple, and our budget was not representative of the impression that I wanted to make as a newly married couple. I didn't want to waste a lot of money on decorations that I would never use again. I searched pinterest for "Thanksgiving" and "Dinner Party", to see what everyone else was thinking. I came up with this:


I placed two smaller tables together to make one larger table and gathered chairs from all over the house to make it work. I decided that I can work the purple plates into a thanksgiving theme by pairing it with orange and brown. I bought 2 yards of fabric (using the 50% off coupon, making it 3.00 per yard) and used it as a table cloth. After dinner, you can wash the fabric and use it for other projects. I did hit the dollar store for the paper thanksgiving napkins, and scattered doily leaves.


I found a tutorial on pinterest to make a stick vase using sticks and an old coffee can. You can find the tutorial here. This was quick and fun to make, and actually got us outside for a walk to gather the sticks. Even better? I moved the vase and flowers to the front porch after the dinner, and they actually looked pretty good (though dried) for about a month!


I found a pin that used these dollar store votive holders and floated a fake flower in water. The pin went to a dead link and I wasn't a fan of the fake flowers, but I had leftover coffee beans that smelled amazing and tons of votive candles in our emergency supply. So I picked up a few votive holders, combined all and ta da! I still drool at the smell of coffee beans.


I picked up thin Hershey's bars for fifty cents a piece, added layered scrapbook papers and used them as place cards.


Total cost for my thanksgiving dinner decorations?
Hershey Place Cards: $4.00
Tablecloth: $6.00
Votive Holders: $4.00
Flowers and Vase: $9.99
Napkins and Scattered Leaves: $2.00
$26.00 total. 


I needed ideas for baby shower gift baskets. I found a pin for these little guys (and girls) to include in baby shower gift bags. They were really easy to make out of baby wash cloths, baby socks, and newborn diapers. You can find the instructions here.


We bought a refurbished sewing machine for $70.00 right around the time I got pregnant. My mom and Jon had been teaching me to sew. I happened across a pin for home made burp cloths and thought that would be a fun, cheap project. This has become my favorite hobby ever. I've made 25 burp cloths for our soon to be baby and have started making more for gifts. It's a really simple, easy, and confidence building project for a new sewer like myself. After about 10, you feel like a professional seamstress. I buy the flannel snuggle fabric from Joanne's (when it's either on sale for $2.99 per yard, or when I have a 50% off coupon), and pair it with either cloth diaper material or cotton terry (regular price is $6.99 but again- only buy when it's 50% off! Sign up for their emails and coupons come almost every other week). Each burp cloth costs about 90 cents to make and will make a great addition to gift baskets. Instructions can be found here.


One of our cheapest parties to host is poker night. It's a ton of fun (though it requires a bit of logistics and forethought to pull of well- more on that later). With a large table, 2 decks of cards, a mason jar to put the $10.00 tournament money in, and about $20.00 for snacks... You have yourself a party! One small issue- I'm the biggest germaphobe in the world.  A bowl of peanuts screams E. Coli and the thought of dipping in a communal dip bowl makes me feel physically ill (don't judge- we all have issues). You can imagine my delight and surprise when I saw a pin for mini plastic dixie cups filled with personal snacks. It cost me $2.00 for pretzels, $4.00 for peanuts, $1.00 for baby carrots, $1.00 for celery, $1.29 for ranch dressing, and $ 2.00 for the dixie cups (with tons of leftovers). Our party food cost less than $12.00! No germs! And it was easy to take the cups to your spot at the table without getting dip everywhere. The original post can be found here.


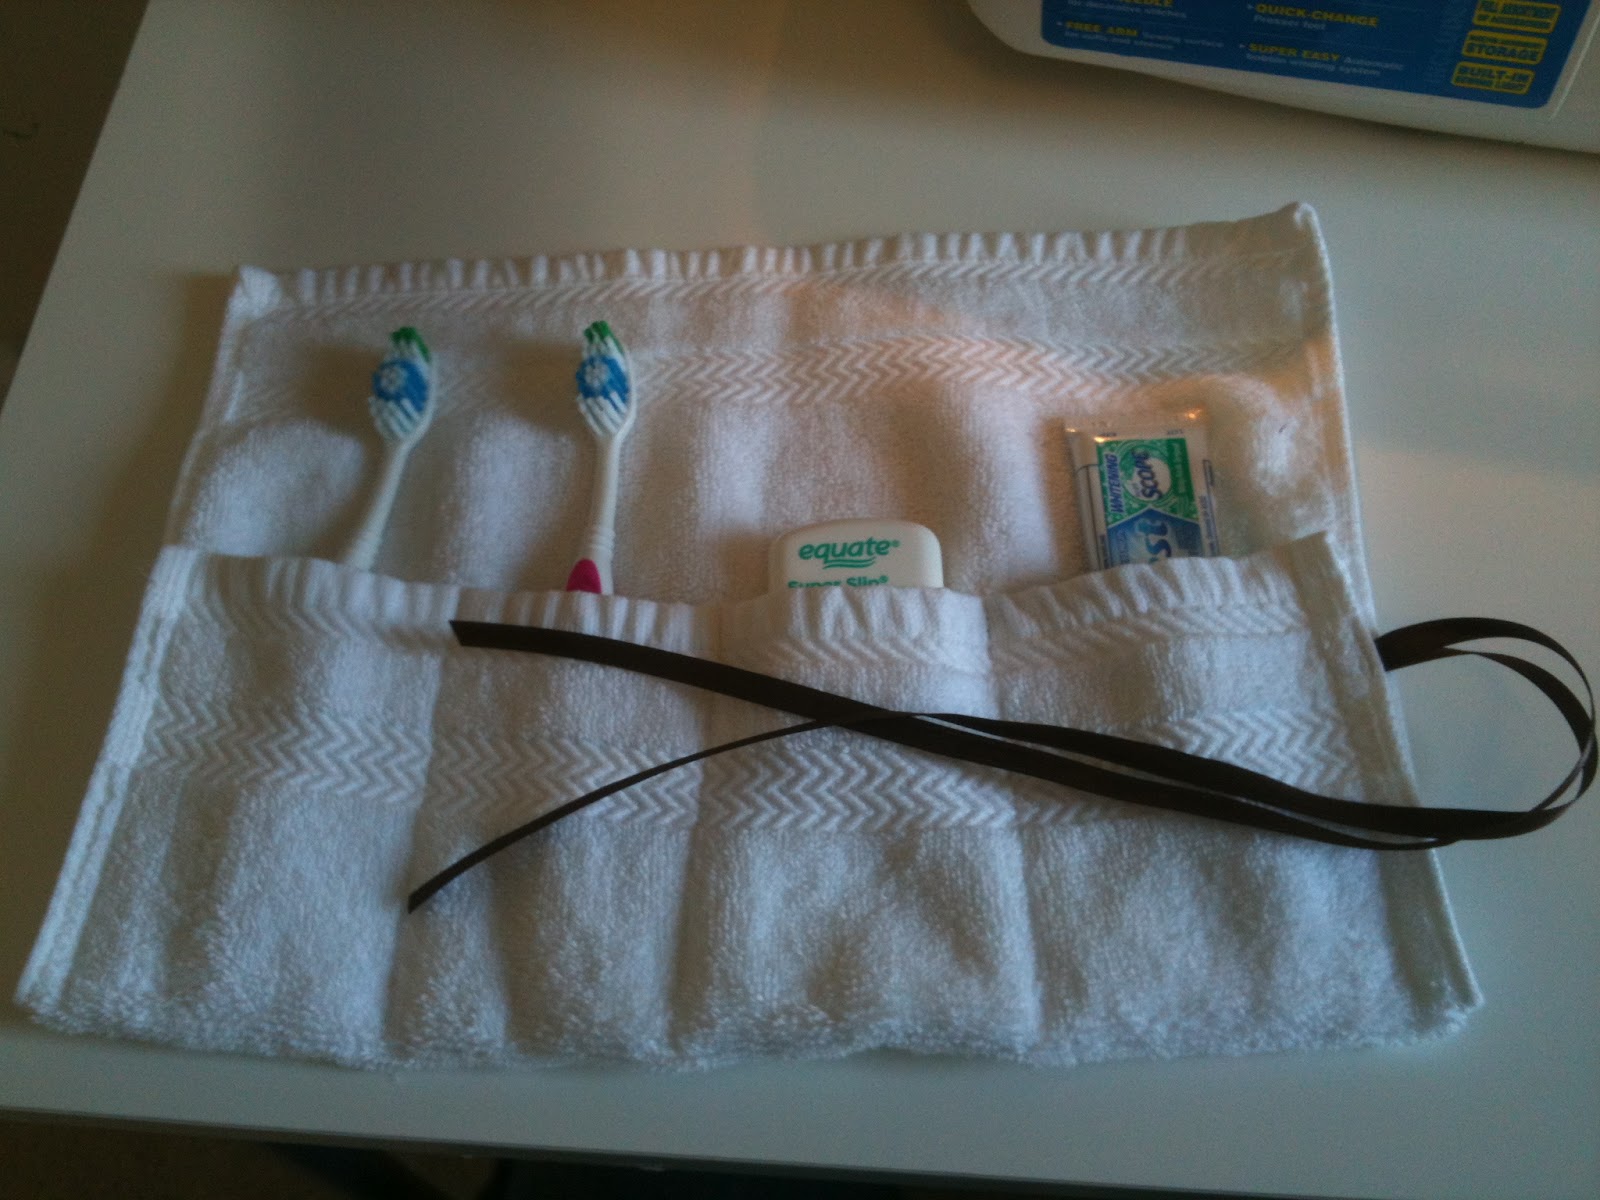
If you can ignore the horrendous nail polish in that last picture (now you can't look at anything else can you?), I can tell you that when I was packing my maternity "go bag" for the hospital, I was reaching for a Ziploc baggie to put our tooth brushes in. I remembered seeing a pin like this. I checked it out and found out that it linked to an etsy shop where she sells these for $10.00 (a great investment if you can't sew- these things are genius!), you can go to her shop from here. Since I'm getting pretty good with the sewing machine now, I decided to wing it and see what happened. It was really easy, took all of five minutes, and I had all of the materials handy. You just need a washcloth and a washable ribbon. You can fit a full size toothpaste in there as well if you would like. It keeps your toothbrushes sanitary. If it gets messy, just throw it in the wash when you get home. I don't feel comfortable posting a tutorial, since she had the original idea and she's selling them. But if you take a look, and you have any experience at all, I'm sure you can figure it out.

There are a million genius projects out there that can save us time and money. Pinterest is a life changing tool to help us think outside the box. If you found something on pinterest that saved you time and money, let us know!

Friday, July 6, 2012

DIY Cheap Screenprinting Baby Onsies Silk Screening

This fourth of July, My darling husband decided that he wanted to teach me how to silkscreen the extra plain onsies that we had from our baby showers onsie decorating table. I was skeptical. I was picturing blotchy paint all over the onsies (and most likely, our furniture and cats).


I'm happy to admit that he did AWESOME!! I was amazed at the quality and appearance of these! If I had more time, I would totally set up an Etsy silk screening shop. The best part is how uncomplicated they were, I honestly feel like anyone could do it. He did two layers - Meaning you silkscreen one color and then overlap another color to make a two color design. We kept it simple and used our Cricut cutting machine to cut out a design.


Sadly, you can't see the great colors in this photo, but the bug onsie is red and black and the apple onsie is green and red.


I'll send you over to his Instructables Site for the full step by step process since he did such a great job of explaining in step by step instructions with photos at each step. I'm totally picturing all the cool stuff you can do with this- Team tee shirts! Take the time to set up one screen and you can do a whole team's tee shirts in just a few minutes! Jot him a note if you have any questions or success stories, I'm dying to see what the truly creative people can do with this!

Full instructions available at:
http://www.instructables.com/id/How-to-make-and-print-with-reusable-silk-screens/

DIY: Bookmark Thank You Cards

I've been making my own cards for a while, but I was looking for a way to improve on my card making. The last wedding card I made took me almost two hours. Since I had over thirty thank you cards to send out this week, That wasn't going to fly unless I quit my job and dedicated my life to card making. (Which seems a bit extreme to save $15.00 on thank you cards). Plus, whether your buying or making your cards, it's really a shame that we work on something so hard that will find it's way to the trash after being read (except for the few sentimental people).

I searched Pinterest for DIY Thank You card designs when I saw an errant post on DIY Bookmarks that I loved (as an avid reader who has a naughty habit of folding pages). They weren't using them as cards, but I kept thinking to myself... Why not? There's plenty of room for your message on the back, You can use scrapbook material on the front. It's extremely frugal, and we're saving trash (twice, since the bookmarks are a third the size of a card and the recipient can actually reuse it if she has a need for it).

I created these bookmark cards using scrapbook paper that I already have, and bits of leftover ribbon. Since I have TONS of scrapbook paper organized by color, but not a lot of ribbon, I picked a ribbon I liked first, then matched it to a coordinating scrapbook paper. I kept running out of ribbon for different colors, so I would just switch to a new color combination. Which actually worked out well, because I could choose a style that I thought the recipient would like best. The only thing I had to buy was blank paper bookmarks. I had originally planned on just cutting them myself from white stock paper using my paper cutter, but I ended up at Michael's Crafts when my husband decided that he wanted our fourth of July holiday to include him teaching me how to silkscreen baby onsies (That's right, my 6'3'', 260 pound, bad ass husband silkscreens... and sews, bakes, creates fancy french dishes that I won't eat because I can't pronounce the ingredients, and knows every single line to the Broadway shows Rent and Legally Blonde: The Musical). Michael's had an enormous pack of blank paper bookmarks for 3.49. Sadly, I threw out the outer package before I saw how many were included, but I'm going to make an educated guess of 150. I grabbed that because $3.49 was well worth the time it would take me to correctly measure out 30 bookmarks.


When I got home, I used my corner rounder on each side of the book marks, Then cut strips of scrapbook paper (I just eyeballed it to be slightly smaller than the bookmark). I rounded out each corner of the scrapbook paper as well and glued to the center of each bookmark using scrapbooking glue. I then used my small hole punch to punch a hole in the top, inserted ribbon and tied off. It took about 15 minutes to do all 30, but the majority of that time was spent deliberating on what combinations to use.


I paired them with stationary envelopes that I already had and made a bundle to fill out when I have some down time. The next day, I wrote my messages on the back of each card and included a tag line that said "*Feel free to reuse me as a bookmark!"


Instead of spending the $9.99 on 36 thank you cards that I had planned, I spent 3.49 for (guesstimate) 150 thank you cards and other projects. Plus, nothing says thank you better than giving someone something they can use.